Sugar Wafer Pencil Cookies – Easy Fun Recipe
Sugar wafer pencil cookies are the perfect way to add a touch of whimsical charm to any occasion! Imagine a stack of these adorable creations arriving at your next bake sale, classroom party, or even just as a sweet surprise for someone special. What’s not to love about edible art that doubles as a delicious treat? People adore sugar wafer pencil cookies for their nostalgic appeal and undeniable cuteness. They’re a delightful twist on a classic cookie, transforming simple ingredients into something truly magical. What makes these sugar wafer pencil cookies truly special is the effortless way they capture the spirit of learning and creativity. They’re surprisingly simple to make, yet they have such a big impact, making them a guaranteed crowd-pleaser. Get ready to unleash your inner artist and bake up some smiles!

Sugar Wafer Pencil Cookies
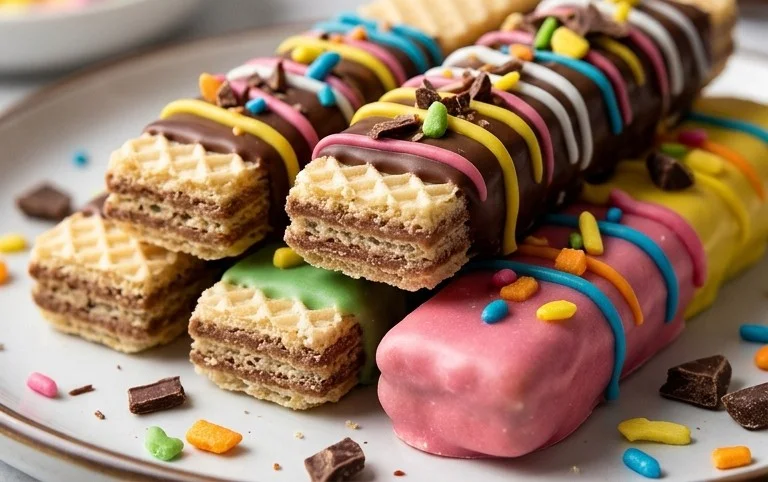
These adorable Sugar Wafer Pencil Cookies are a delightful treat that’s as fun to make as it is to eat! Perfect for back-to-school parties, teacher appreciation gifts, or just a whimsical afternoon snack, these cookies transform simple sugar wafers into charming pencils. The process is surprisingly straightforward, making it a great project for bakers of all skill levels, even those who might be new to decorating. We’ll be using readily available ingredients to create a visually appealing and delicious cookie that’s sure to impress. So, gather your ingredients and let’s get ready to craft some edible art!
Ingredients:
Crafting Your Pencil Cookies
Melting the White Chocolate
The foundation of our pencil’s “lead” and “eraser” is white chocolate. For best results, I recommend using white chocolate melting wafers, as they are formulated to melt smoothly and set up beautifully without the need for tempering.
Carefully measure out your 10-ounce bag of white chocolate melting wafers. You can melt these in a microwave-safe bowl or using a double boiler.
If microwaving, place the wafers in a clean, dry bowl. Microwave on 50% power for 30-second intervals, stirring well after each interval. It’s crucial to stir thoroughly between bursts of heat, as white chocolate can scorch easily. Continue this process until the wafers are almost entirely melted. Remove from the microwave and stir until the residual heat melts any remaining lumps, resulting in a smooth, glossy chocolate.
Alternatively, a double boiler method involves placing the wafers in a heatproof bowl set over a saucepan of simmering water. Ensure the bottom of the bowl does not touch the water. Stir constantly until the chocolate is smooth and melted. This method offers a bit more control and is excellent for preventing overheating. Once melted, remove the bowl from the heat and let it sit for a minute while you prepare for the next step.
Creating the Pencil “Lead”
Now it’s time to give our pencils their sharp points. You’ll want to divide your melted white chocolate into two portions. In a small, separate bowl, place about a quarter of your melted white chocolate. This smaller portion will be tinted red.
Add a tiny drop of red gel food coloring to this smaller portion. Gel food coloring is essential here because liquid food coloring can cause chocolate to seize or become grainy. Start with a very small amount of coloring and stir it in thoroughly. You’re aiming for a warm, pinkish-red hue that resembles the lead of a sharpened pencil. If you desire a deeper red, add color in minuscule increments, stirring well after each addition, until you achieve your desired shade. The goal is to have enough colored chocolate to dip just the tip of each sugar wafer.
Assembling the Pencil Body
Take one sugar wafer cookie at a time. Dip one end of the sugar wafer into the colored white chocolate, allowing the chocolate to coat about an inch of the cookie. You want a clean, even coating that mimics the sharpened point of a pencil. For a cleaner dip, you can hold the wafer by the opposite end. Gently shake off any excess chocolate back into the bowl.
Adding the “Eraser” and “Ferrule”
Once you have dipped all 20 sugar wafers in the red chocolate, place them on a piece of parchment paper or a silicone baking mat. Allow the red chocolate to set up slightly. This will prevent the next layer of chocolate from smearing. You can speed this up by placing them in the refrigerator for a few minutes, but be careful not to let them get too cold, as condensation can form.
Now, take the remaining plain melted white chocolate. Dip the opposite end of each sugar wafer, just where the plain wafer begins, into the plain white chocolate. This creates the “ferrule,” the metal band that holds the eraser to the pencil. Aim for a consistent width for the ferrule. Again, gently shake off any excess.
Finishing Touches and Details
While the plain white chocolate “ferrules” are still wet, it’s time to add the final detail – the eraser. Take a mini chocolate chip and gently press it onto the wet white chocolate at the very end of the cookie. The chocolate will act as glue, holding the mini chocolate chip securely in place as it dries. These mini chocolate chips perfectly mimic the look of a pencil eraser.
Place all your decorated pencil cookies back onto your parchment-lined tray. Allow them to set completely. This can take about 30-60 minutes at room temperature, or you can expedite the process by placing them in the refrigerator for about 15-20 minutes until the chocolate is firm to the touch. Once set, your delightful Sugar Wafer Pencil Cookies are ready to be enjoyed or gifted! They store well in an airtight container at room temperature for several days.
Conclusion:
I hope you’ve enjoyed learning how to create these delightful Sugar Wafer Pencil Cookies! This recipe is truly fantastic because it’s not only adorable and perfect for back-to-school celebrations or any themed party, but it’s also surprisingly simple to make. The crisp texture of the sugar wafer combined with the creamy frosting and edible candy tip creates a wonderful sensory experience. These cookies are a guaranteed hit with kids and adults alike, adding a touch of whimsy to any occasion.
When it comes to serving, these Sugar Wafer Pencil Cookies are incredibly versatile. They look stunning arranged on a platter alongside other baked goods, or they can be packaged individually as charming party favors. Imagine them as a sweet addition to a teacher’s appreciation gift basket! For variations, don’t be afraid to experiment with different frosting colors to match school colors or seasonal themes. You could also try adding a sprinkle of edible glitter to the “lead” tip for extra sparkle, or even use different flavored wafer cookies if you can find them.
I highly encourage you to give this recipe a try! It’s a fun and rewarding baking project that yields impressive results with minimal fuss. Get your aprons on and let’s get creative in the kitchen!
Frequently Asked Questions:
Q: What kind of frosting is best for decorating these cookies?
A: A simple buttercream frosting made with butter, powdered sugar, and a splash of milk or cream works beautifully. Royal icing is also a great option if you’re looking for a harder, more durable finish, which can be especially helpful for intricate details or if you plan to package them for favors.
Q: Can I make these cookies ahead of time?
A: Absolutely! Once decorated and the frosting has set, you can store these Sugar Wafer Pencil Cookies in an airtight container at room temperature for up to 3-4 days. This makes them ideal for preparing for events in advance.
Q: What are some other edible decorations I could use for the pencil tip?
A: Besides candy melts or frosting, you could also use small pieces of fondant, gum paste, or even colored candy corn cut down to size for a fun, textured “lead.” Experimenting with different edible paints or edible markers can also add unique details.
Sugar Wafer Pencil Cookies
A fun and easy recipe for creating edible pencils using sugar wafers and white chocolate.
Ingredients
-
{‘@type’: ‘Ingredient’, ‘name’: ‘sugar wafer cookies’, ‘amount’: ’20’}
-
{‘@type’: ‘Ingredient’, ‘name’: ‘white chocolate melting wafers’, ‘amount’: ’10’, ‘unitCode’: ‘ounce’}
-
{‘@type’: ‘Ingredient’, ‘name’: ‘red gel food coloring’}
-
{‘@type’: ‘Ingredient’, ‘name’: ‘mini chocolate chips’, ‘amount’: ’20’}
-
{‘@type’: ‘Ingredient’, ‘name’: ‘vegetable oil’, ‘amount’: ‘1’, ‘unitCode’: ‘teaspoon’}
Instructions
-
Step 1
Prepare your workspace by lining a baking sheet with parchment paper. -
Step 2
Melt the white chocolate melting wafers according to package directions. Stir in 1 teaspoon of vegetable oil to achieve a smoother consistency. -
Step 3
Divide about half of the melted white chocolate into a small bowl. Add a few drops of red gel food coloring and stir until you achieve a pinkish-red hue for the eraser. -
Step 4
Dip one end of each sugar wafer cookie into the red-tinted white chocolate to create the eraser. Place on the prepared baking sheet. -
Step 5
Dip the other end of each sugar wafer cookie into the plain melted white chocolate to create the pencil tip. Quickly press a mini chocolate chip into the wet white chocolate at the tip to resemble the pencil lead. -
Step 6
Allow the chocolate to set completely at room temperature or in the refrigerator for about 10-15 minutes.
Important Information
Nutrition Facts (Per Serving)
It is important to consider this information as approximate and not to use it as definitive health advice.
Allergy Information
Please check ingredients for potential allergens and consult a health professional if in doubt.