Frozen S’mores – Easy Cool Campfire Treat
Frozen S’mores are the ultimate campfire treat, reinvented for endless summer enjoyment! Who doesn’t adore the gooey, melty goodness of a classic s’more? That perfect bite of toasted marshmallow, rich chocolate, and crunchy graham cracker is pure nostalgic bliss. But what if you could capture that magic and make it refreshingly cool, a delightful escape from the heat? That’s precisely where our Frozen S’mores come in. We’ve taken all the beloved flavors and textures you crave and transformed them into a frozen dessert sensation that’s surprisingly easy to make. Imagine a creamy, dreamy, no-bake wonder that delivers all the iconic taste of s’mores without the sticky fingers or the fire. Get ready to elevate your dessert game with this sensational twist on a beloved favorite!
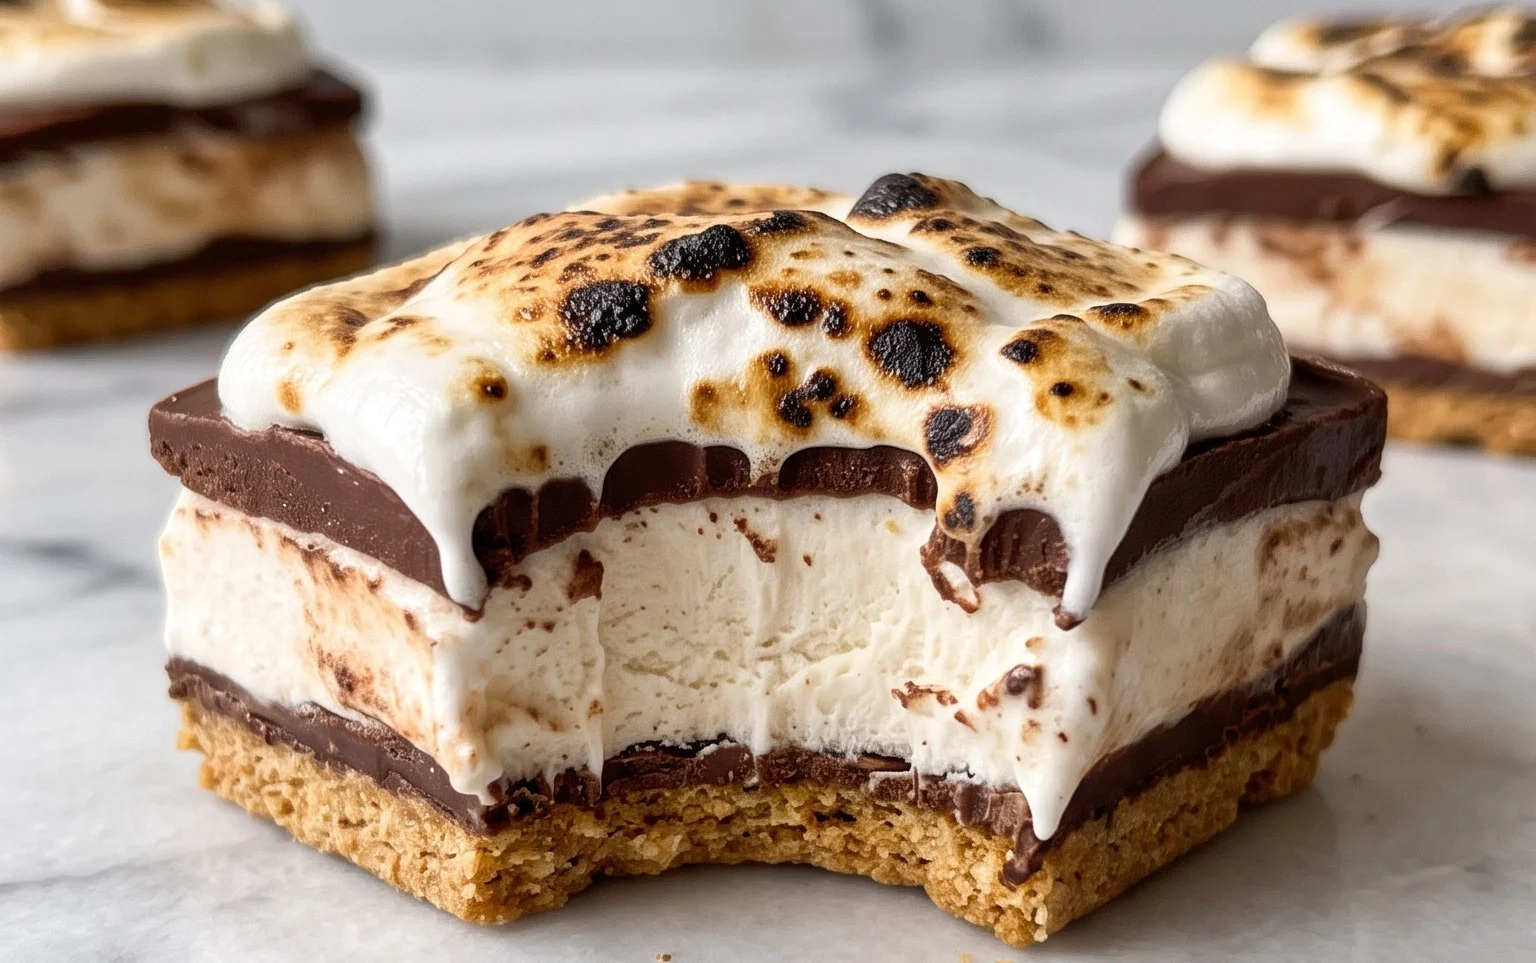
Frozen S’mores
Get ready for a truly magical dessert experience! We’re taking the beloved campfire classic, the s’more, and transforming it into a cool, creamy, and utterly delightful frozen treat. Forget sticky fingers and burnt marshmallows; these Frozen S’mores are a sophisticated yet incredibly easy way to satisfy your sweet tooth. They’re perfect for summer gatherings, a special family dessert, or honestly, just a Tuesday night when you need a little bit of joy. The combination of rich chocolate, creamy sweetness, and that hint of graham cracker crunch is simply irresistible. And the best part? You don’t need any fancy equipment or advanced culinary skills. Just a few simple ingredients and a little bit of freezer time will deliver a dessert that’s sure to impress. Let’s dive in and create some frozen magic!
Ingredients:
- 1 (5.9-ounce) box instant chocolate pudding
- 2 1/2 cups whole milk
- 2 1/2 cups Cool Whip, defrosted and divided
- 12 graham crackers, broken in half and divided
- 5 ounces cream cheese, at room temperature
- 7 ounces marshmallow creme
- pinch of salt
Cooking Instructions:
Step 1: Preparing the Chocolate Pudding Base
The foundation of our frozen s’mores is a rich and creamy chocolate pudding. In a medium-sized bowl, whisk together the contents of the instant chocolate pudding box with the 2 1/2 cups of whole milk. It’s important to whisk thoroughly to ensure there are no dry pockets of pudding mix remaining. Once combined, let this mixture sit for about 5 minutes to begin thickening. This initial thickening is crucial for achieving the right consistency in our final dessert. While it’s setting, grab a separate large bowl. Add 1 cup of the defrosted Cool Whip to this large bowl. We’re going to gently fold the thickened chocolate pudding into the Cool Whip. This step lightens the pudding, making it airy and perfect for our frozen dessert. Be gentle as you fold; we want to keep as much air in the mixture as possible for a light texture.
Step 2: Creating the Creamy Cheese Layer
Next, we’re going to prepare the wonderfully creamy element that will bring everything together. In a separate bowl (this is where your room temperature cream cheese comes in handy!), beat the 5 ounces of softened cream cheese until it’s smooth and fluffy. This is best done with an electric mixer, but a strong whisk and some arm power will also work. Once the cream cheese is smooth, gradually add the 7 ounces of marshmallow creme. Continue beating until the cream cheese and marshmallow creme are thoroughly combined into a luscious, smooth, and slightly sticky mixture. This layer provides that signature marshmallow sweetness and a delightful tang from the cream cheese that balances the chocolate beautifully. Don’t worry if it’s a little sticky; that’s what we’re aiming for!
Step 3: Assembling the Frozen S’mores
Now for the fun part – assembly! We’re going to build our frozen s’mores in layers. Take a 9×13 inch baking dish or a similar-sized freezer-safe container. Line the bottom of the dish with a single layer of the broken graham cracker halves. Try to cover the bottom as completely as possible, but don’t worry about perfect coverage; gaps will be filled with deliciousness. Spoon the chocolate pudding and Cool Whip mixture evenly over the graham cracker layer. Smooth the top with a spatula. Then, carefully spread the cream cheese and marshmallow creme mixture over the chocolate pudding layer. Again, aim for an even layer. We’re creating a decadent, multi-layered treat that will be frozen into a solid, sliceable dessert.
Step 4: The Final Touches and Freezing
Before we send our creation off to the freezer, we need to add the final layer of fluffy goodness. Take the remaining 1 1/2 cups of defrosted Cool Whip and spread it evenly over the cream cheese and marshmallow creme layer. This top layer of Cool Whip not only adds more delightful creaminess but also helps to seal in all the flavors and textures. Gently press the remaining graham cracker halves onto the top of the Cool Whip. You can arrange them in a decorative pattern or just cover the surface. This final layer of graham crackers adds that essential s’mores crunch and visual appeal. Once everything is assembled, cover the baking dish tightly with plastic wrap or a lid. This is crucial to prevent freezer burn and keep your frozen s’mores tasting fresh. Place the dish in the freezer for at least 6 hours, or preferably overnight, until it is firm and completely frozen.
Step 5: Serving Your Frozen Masterpiece
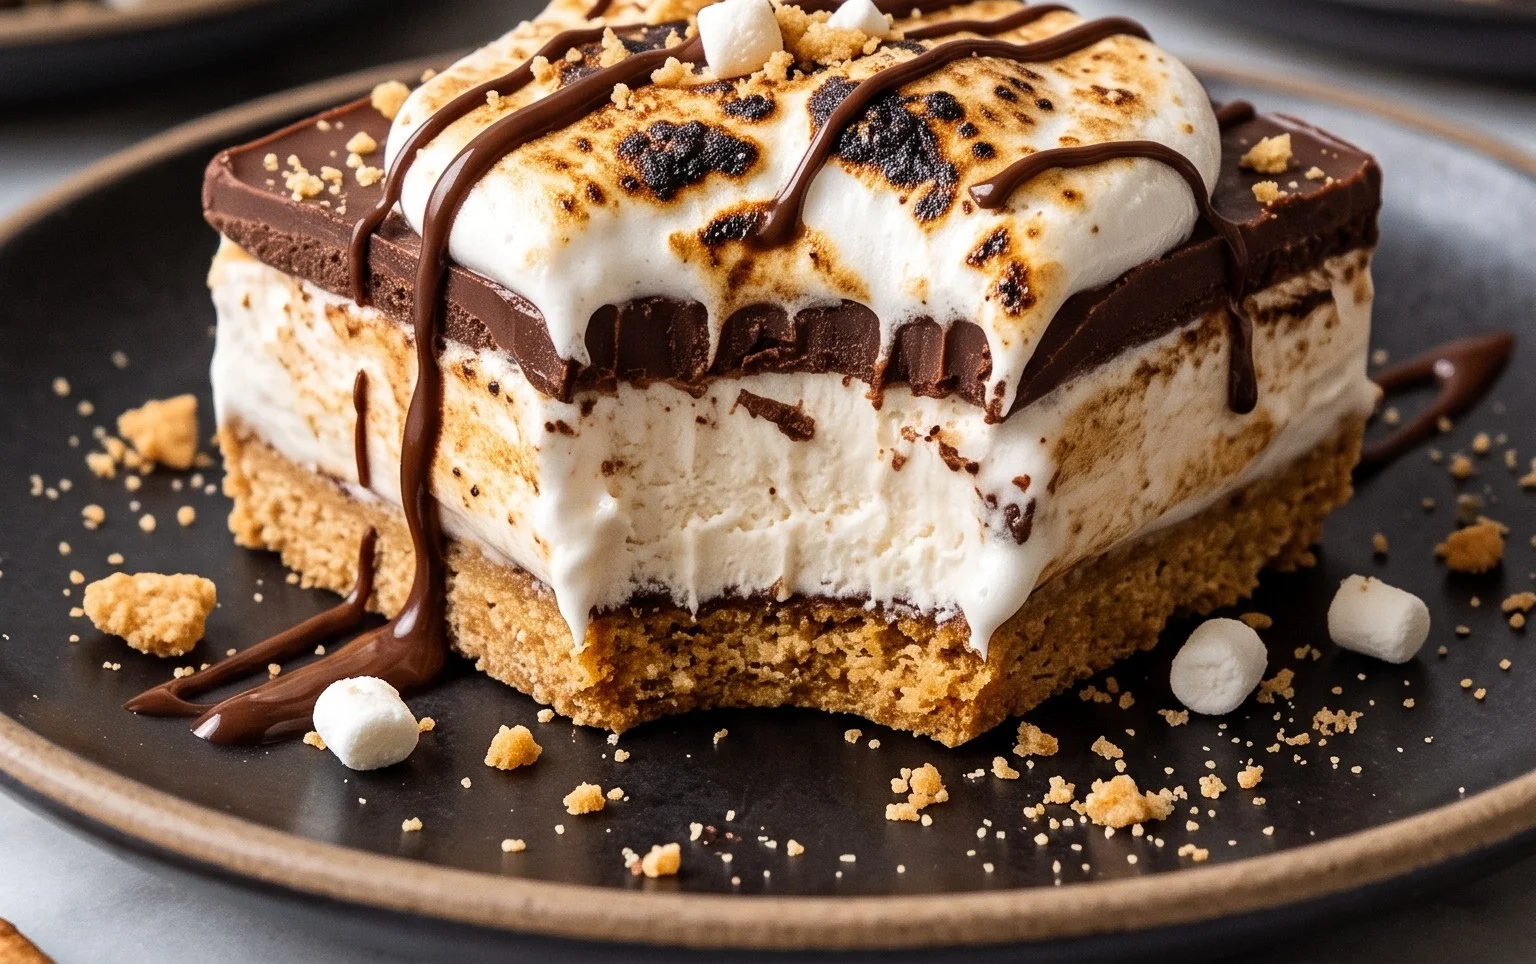
Once your frozen s’mores are completely solid, it’s time to serve! To make slicing easier, run a sharp knife under hot water and dry it before each cut. This will help the knife glide through the frozen dessert. Cut the frozen s’mores into squares or rectangles, similar to how you would cut a brownie. If you’re serving them immediately, you can let them sit at room temperature for a few minutes to soften slightly, making them easier to eat. For an extra touch of indulgence, you can serve them with a dollop of extra Cool Whip, a drizzle of chocolate syrup, or even some toasted mini marshmallows (if you’re feeling ambitious!). These frozen s’mores are a wonderful make-ahead dessert, so feel free to prepare them a day or two in advance for your next party. Enjoy this delightful twist on a classic!
Conclusion:
And there you have it – the perfect recipe for Frozen S’mores! This delightful treat takes the beloved campfire classic and transforms it into a cool, creamy, and utterly irresistible dessert perfect for any occasion. We love this recipe because it offers all the iconic flavors of graham cracker, gooey marshmallow, and rich chocolate, but with a refreshing twist that’s ideal for warmer weather or when you’re simply craving something a little different. It’s surprisingly easy to make, making it a fantastic activity to do with family or friends. The combination of textures and tastes is truly magical, offering a sophisticated yet simple indulgence.
These Frozen S’mores are wonderfully versatile. Serve them as a delightful after-dinner dessert, a crowd-pleasing party treat, or even a fun afternoon snack. They pair beautifully with a cold glass of milk or a refreshing iced coffee. If you’re feeling adventurous, consider some fun variations! You could add a sprinkle of sea salt on top for a sweet and salty contrast, or even incorporate some finely chopped toasted pecans or almonds into the chocolate layer for an extra crunch. Don’t be afraid to experiment with different types of chocolate – dark, milk, or even white chocolate can bring a unique dimension to your Frozen S’mores.
We wholeheartedly encourage you to give this Frozen S’mores recipe a try. It’s a guaranteed winner that will have everyone asking for seconds. Get ready to impress your taste buds and delight your guests with this innovative take on a timeless favorite. We can’t wait to hear about your creations!
Frequently Asked Questions:
Can I make Frozen S’mores ahead of time?
Absolutely! Frozen S’mores are an excellent make-ahead dessert. Once they are fully frozen, you can store them in an airtight container in the freezer for up to a week. This makes them perfect for entertaining, as you can prepare them in advance and have them ready to serve whenever needed.
What’s the best way to store leftovers?
If you happen to have any delicious leftovers, the best way to store them is in a single layer in an airtight container or a freezer-safe bag. Placing parchment paper between layers can prevent them from sticking together. This ensures they maintain their delightful texture and flavor for future enjoyment.
Frozen S’mores
A delicious no-bake frozen dessert that captures the essence of s’mores with a creamy, chilled twist.
Ingredients
-
1 (5.9-ounce) box instant chocolate pudding
-
2 1/2 cups whole milk
-
2 1/2 cups Cool Whip, defrosted and divided
-
12 graham crackers, broken in half and divided
-
5 ounces cream cheese, at room temperature
-
7 ounces marshmallow creme
-
pinch of salt
Instructions
-
Step 1
In a large bowl, whisk together the instant chocolate pudding mix and whole milk until well combined and beginning to thicken. -
Step 2
In a separate bowl, beat the softened cream cheese until smooth. Gradually beat in the marshmallow creme until combined. -
Step 3
Gently fold about 1 1/2 cups of the defrosted Cool Whip into the cream cheese and marshmallow mixture until no streaks remain. -
Step 4
Fold the chocolate pudding mixture into the cream cheese mixture until evenly incorporated. -
Step 5
Crush half of the graham cracker pieces into crumbs. Stir the graham cracker crumbs and a pinch of salt into the pudding mixture. -
Step 6
Line a 9×13 inch baking dish with parchment paper, leaving an overhang on the sides for easy removal. -
Step 7
Spread the remaining 1 cup of Cool Whip evenly over the bottom of the prepared baking dish. -
Step 8
Pour the pudding mixture over the Cool Whip layer and spread evenly. -
Step 9
Arrange the remaining whole graham cracker halves on top of the pudding layer. Press down gently. -
Step 10
Cover the dish with plastic wrap and freeze for at least 4 hours, or until firm. Let sit at room temperature for 10-15 minutes before cutting and serving.
Important Information
Nutrition Facts (Per Serving)
It is important to consider this information as approximate and not to use it as definitive health advice.
Allergy Information
Please check ingredients for potential allergens and consult a health professional if in doubt.