Best Mini Cheesecakes Creamy Dreamy Recipe
The Best Mini Cheesecake Recipe is a dream come true for anyone who adores that irresistible creamy tang and sweet graham cracker crunch, but perhaps lacks the space or desire for a full-sized dessert. Have you ever found yourself staring longingly at a giant cheesecake, wishing for just a few perfect bites? That’s precisely the magic that mini cheesecakes offer! They’re the ultimate crowd-pleaser, ideal for parties, potlucks, or even just a sophisticated treat for yourself. What truly sets these mini wonders apart is their perfect portion control, allowing you to indulge without the guilt. Plus, the slightly crispier crust on each individual cheesecake is a textural delight that a larger one sometimes misses. This recipe guarantees a smooth, decadent filling and a delightful graham cracker embrace every single time. Get ready to discover your new go-to for the best mini cheesecake experience!
The Best Mini Cheesecake Recipe
There’s something undeniably charming about mini cheesecakes. They’re perfectly portioned, delightfully decadent, and incredibly versatile. Whether you’re hosting a party, looking for a sweet treat to impress, or simply craving a personal indulgence, this recipe for “The Best Mini Cheesecake” is your go-to. We’re talking about creamy, dreamy, classic cheesecake flavor, baked to perfection in a convenient, individual size. Forget the fuss of a large cheesecake; these mini versions are easier to make, quicker to bake, and infinitely more fun to serve. Get ready to wow your taste buds and your guests with these little delights!
Ingredients:
- 1 cup (113g) graham cracker crumbs
- 4 Tbsp unsalted butter (melted)
- 16 oz full fat cream cheese (softened to room temperature)
- ½ cup (99g) granulated sugar
- 1 tsp vanilla extract
- 2 large eggs
- Whipped cream, for topping
- Fresh fruit, for topping
Getting Started: Preparing the Crusts
The foundation of any great cheesecake is a delicious crust. For our mini cheesecakes, we’re keeping it classic and simple with a buttery graham cracker crust. The key to a perfectly formed crust is ensuring your graham cracker crumbs are fine and evenly mixed with the melted butter. You want the consistency of wet sand.
1. Combine the Crust Ingredients: In a medium bowl, add your graham cracker crumbs. Pour the melted unsalted butter over the crumbs. Using a fork or your hands, mix until all the crumbs are moistened and the mixture holds together when squeezed. It’s important to get this consistency right; too dry and it will crumble, too wet and it will be greasy.
2. Press the Crusts: This is where we prepare our mini cheesecake pans. You can use a standard mini muffin tin, or, for a more polished look and easier removal, silicone mini cheesecake molds or mini tart pans. Divide the graham cracker mixture evenly among your chosen molds, pressing firmly onto the bottom and slightly up the sides of each mold. I like to use the bottom of a small glass or the back of a spoon to ensure a compact and even layer. This step is crucial for a crust that doesn’t fall apart when you enjoy your cheesecake. You want a nice, sturdy base for that creamy filling.
Crafting the Creamy Filling
Now for the star of the show: the cheesecake filling. The secret to a silky-smooth, lump-free filling lies in the **temperature of your cream cheese and the gentle mixing**.
3. Cream the Cheese and Sugar: In a large bowl, using an electric mixer (handheld or stand mixer with a paddle attachment), beat the softened full-fat cream cheese until it is completely smooth and creamy. This is a critical step; any lumps at this stage will carry through to your final cheesecake. Once smooth, gradually add the granulated sugar and continue to beat until well combined and no grittiness from the sugar remains. Scrape down the sides of the bowl frequently to ensure everything is incorporated.
4. Incorporate Flavor and Eggs: Add the vanilla extract to the cream cheese mixture and beat until just combined. Now, it’s time for the eggs. Add the large eggs, one at a time, beating on low speed until each egg is just incorporated. Be careful not to overmix the eggs, as this can incorporate too much air, leading to cracks in your cheesecakes during baking. Overmixing also risks a tougher texture. We are aiming for a smooth, luscious filling.
Baking These Little Treasures
Mini cheesecakes bake much faster than their full-sized counterparts, making them a more achievable indulgence.
5. Fill and Bake: Preheat your oven to 325°F (160°C). Carefully spoon the cheesecake filling evenly over the prepared graham cracker crusts in each mold, filling them about two-thirds to three-quarters full. Avoid overfilling, as they will puff up slightly as they bake. Place your mini cheesecake molds on a baking sheet. This makes them easier to transfer in and out of the oven and catches any potential drips. Bake for 18-22 minutes, or until the edges are set and the centers are still slightly jiggly. They will continue to set as they cool.
6. Cooling is Key: Once baked, carefully remove the baking sheet from the oven. Let the mini cheesecakes cool in their molds on a wire rack for about 15-20 minutes. Then, gently run a thin knife or offset spatula around the edges of each cheesecake to loosen them from the molds before transferring them to the wire rack to cool completely. For the best texture and flavor, chill them in the refrigerator for at least 2-3 hours, or preferably overnight, before serving. This allows the cheesecakes to fully set and the flavors to meld beautifully.
Serving Your Masterpieces
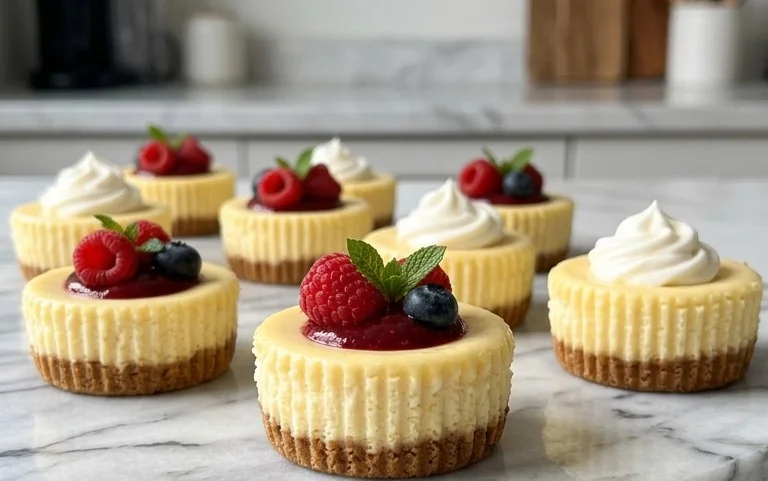
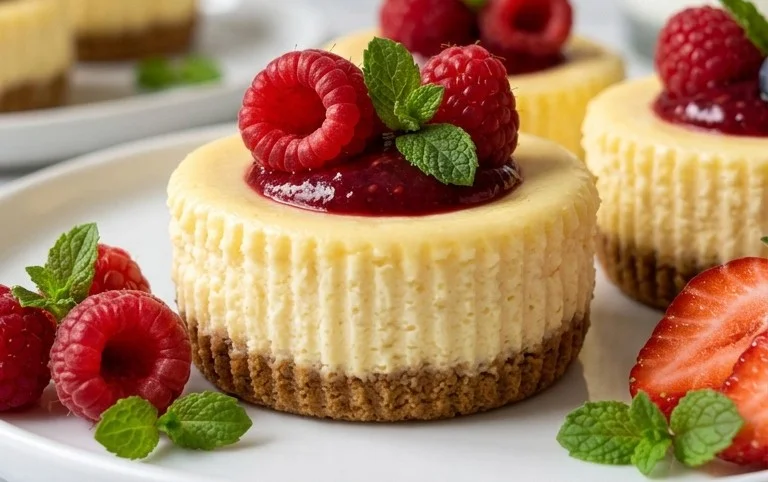
The beauty of mini cheesecakes is their individual charm and the endless possibilities for toppings. Once chilled and fully set, gently remove them from their molds. Top each mini cheesecake with a dollop of fluffy whipped cream and a generous scattering of fresh fruit. Think vibrant berries like strawberries, raspberries, and blueberries, or slices of ripe peaches or kiwi. The tartness of the fruit cuts through the richness of the cheesecake perfectly, creating a delightful contrast. These are perfect for any occasion, from a casual dessert to an elegant gathering. Enjoy every bite of these irresistible mini delights!
Conclusion:
So there you have it – the ultimate guide to crafting the best mini cheesecake recipe! I truly believe these little delights are a game-changer for any dessert lover. They offer that irresistible creamy, tangy cheesecake flavor in a perfectly portioned, crowd-pleasing package. The ease of preparation, combined with the impressive presentation, makes them ideal for parties, special occasions, or simply a decadent treat for yourself. Whether you’re a seasoned baker or just starting out, this recipe is designed for success, promising a smooth, rich filling every time.
Serving these mini cheesecakes is a joy. They are fantastic on their own, but I highly recommend topping them with fresh berries, a swirl of whipped cream, a drizzle of chocolate sauce, or a dollop of fruit compote. For a more adventurous twist, consider a salted caramel sauce or a sprinkle of crushed cookies. Don’t be afraid to experiment with variations! You can easily add a hint of lemon zest to the batter for extra brightness, or even swirl in some fruit puree for a beautiful marbled effect. Give this recipe a try – I’m confident you’ll be delighted with the results and they’ll become a staple in your dessert repertoire.
Frequently Asked Questions:
Can I make these mini cheesecakes ahead of time?
Absolutely! Mini cheesecakes are perfect for making ahead. You can bake them a day or two in advance and store them in the refrigerator. Once they’ve cooled completely, cover them loosely with plastic wrap or place them in an airtight container. This makes them ideal for busy hosts!
What’s the best way to prevent my mini cheesecakes from cracking?
While cracking is less common with mini cheesecakes compared to their larger counterparts, you can still minimize the risk. Ensure you don’t overmix the batter after adding the eggs, as this incorporates too much air. Also, avoid overbaking. Bake just until the edges are set and the center is slightly jiggly.
How long do these mini cheesecakes typically last in the refrigerator?
Properly stored in an airtight container, these mini cheesecakes will stay delicious in the refrigerator for about 3-4 days. The creamy texture and delightful flavor hold up well during this time.
The Best Mini Cheesecake Recipe
A simple and delicious recipe for classic mini cheesecakes with a graham cracker crust.
Ingredients
-
1 cup (113g) graham cracker crumbs
-
4 Tbsp unsalted butter, melted
-
16 oz full fat cream cheese, softened to room temperature
-
½ cup (99g) granulated sugar
-
1 tsp vanilla extract
-
2 large eggs
-
whipped cream, for topping
-
fresh fruit, for topping
Instructions
-
Step 1
Preheat oven to 350°F (175°C). Line a 12-cup muffin tin with paper liners. -
Step 2
In a small bowl, combine graham cracker crumbs and melted butter. Mix until well combined. Press about 1 tablespoon of the mixture into the bottom of each muffin liner. -
Step 3
In a large bowl, beat the softened cream cheese until smooth and creamy. -
Step 4
Gradually beat in the granulated sugar and vanilla extract until combined. -
Step 5
Add the eggs one at a time, beating well after each addition until just combined. Do not overmix. -
Step 6
Spoon the cream cheese mixture evenly over the graham cracker crusts in the muffin liners. -
Step 7
Bake for 20-25 minutes, or until the edges are set and the centers are still slightly soft. -
Step 8
Let the cheesecakes cool in the muffin tin for 10 minutes, then transfer to a wire rack to cool completely. Chill in the refrigerator for at least 2 hours. -
Step 9
Top with whipped cream and fresh fruit before serving.
Important Information
Nutrition Facts (Per Serving)
It is important to consider this information as approximate and not to use it as definitive health advice.
Allergy Information
Please check ingredients for potential allergens and consult a health professional if in doubt.